Authenticate to WebSphere using the WebSEAL jwt junction
In a recent project, I wanted to quickly setup a jwt junction to a WebSphere Traditional Server (actually to a HCL Portal Server).
I used a WebSphere Container image, that you can find here : WebSphere container images
That did not go as seamless as I had expected !
I suppose the moral of the story is that hardly anybody is still using WebSphere Traditional, and everybody is using Liberty/OpenLiberty (or a different flavored java application server).
WebSphere
For this setup, I’ll just run a WebSphere container on my local machine using Podman. I’ll setup the default application (aka. Snoop), configure OIDCRP as TAI and import certificates. This is all bundled in the build.
A repository with example files needed to run this setup yourself is here : https://github.com/Bozzie4/isva-websphere-jwt
This includes the ContainerFile , and some jython scripts to configure WebSphere.
OIDCRP TAI properties
The OIDC TAI has a number of properties, and although the documentation lists only some properties as required (See https://www.ibm.com/docs/en/was-nd/9.0.5?topic=party-openid-connect-relying-custom-properties#csec_oidprop__usejwtfromrequest), in reality a lot more properties are necessary to get the TAI to work.
These are the properties (as defined in the source information here https://github.com/Bozzie4/isva-websphere-jwt)
| parameter | value | description |
|---|---|---|
| provider_1.useJwtFromRequest | required | |
| provider_1.identifier | isvajwt | This is a unique id in WebSphere |
| provider_1.issuerIdentifier | https://issuer |
This is the issuer as defined in the incoming jwt |
| provider_1.interceptedPathFilter | /.* |
This instructs the OIDC TAI to intercept ALL incoming requests … |
| provider_1.excludedPathFilter | /ibm/.*,/admin/.* |
… except these |
| provider_1.filter | request-url%=/snoop/ |
I’m not sure what this filter adds to the first one …. |
| provider_1.tokenReuse | true | This indicates that an incoming token can be reused (this will be the case with the webseal junction, the same jwt will be sent as long as it’s still valid |
| provider_1.signVerifyAlias | signer | The name of the alias, in both the local truststore and jwks.json |
| provider_1.audiences | ALL_AUDIENCES |
Required, because of the TAI… |
| provider_1.setLtpaCookie | true | Optional, this generates an ltpa cookie, so the jwt is only used on the first request |
| provider_1.useRealm | WAS_DEFAULT |
Required, otherwise the authentication fails (it obviously can be any WebSphere domain) |
| provider_1.jwkEndpointUrl | https://default.verifyaccess.local/jwks.json |
This is the jwks endpoint on ISVA, there’s a hotfix for ISVA 10.0.6 |
| provider_1.signatureAlgorithm | RS256 |
The algoritm. Must be RS256 for the jwt junction |
You can find the jython script to configure the TAI in the Git repository.
Compared to the OpenLiberty/Liberty features that support jwt (eg. mpJwt or openidconnect), this TAI expect more claims to be available although the OIDC specification clearly defines them as optional.
Create a custom docker image
This copies the signer certificates , and a number of configuration scripts into the container.
FROM icr.io/appcafe/websphere-traditional:latest
COPY --chown=was:root files/*.cer /tmp
COPY --chown=was:root scripts/*.py /work/config/
COPY --chown=was:root config/PASSWORD /tmp/PASSWORD
RUN /work/configure.sh
The DefaultApplication and the WebSphereOIDCRP ear files are part of the container image, under /opt/IBM/WebSphere/AppServer/installableApps
You can put a password in the file config/PASSWORD, so that WebSphere does not generate a random one each time …
Build an image based on the containerfile:
podman build -f ContainerFile -t mywebsphere .
Note the container will copy your local /etc/hosts file. So to make the jwkEndPoint available, you can add an entry to your hosts’ /etc/hosts file, it will be added to the container’s /etc/hosts file.
And now start a new container based on the image:
podman run -d --replace --name was -p 9043:9043 -p 9443:9443 localhost/mywebsphere:latest
You’ll need to see a running container using (podman ps)
CONTAINER ID  IMAGE                         COMMAND               CREATED        STATUS        PORTS                                           NAMES
9b8ab2d4cd5b  localhost/mywebsphere:latest  env JVM_EXTRA_CMD...  6 minutes ago  Up 6 minutes  0.0.0.0:9043->9043/tcp, 0.0.0.0:9443->9443/tcp  was
If you don’t see a running container, you need to prepare an selinux policy (or disable selinux in the container altogether), There’s other blog posts on here that you can find ‘SELinux policy for rootless podman on RHEL’
You can access the running container’s Linux console like this:
podman exec -it was /bin/bash
You can now access the WebSphere console (using https://localhost:9043/ibm/console) , and username wsadmin and the password you defined in the PASSWORD file (in my case, passw0rd).
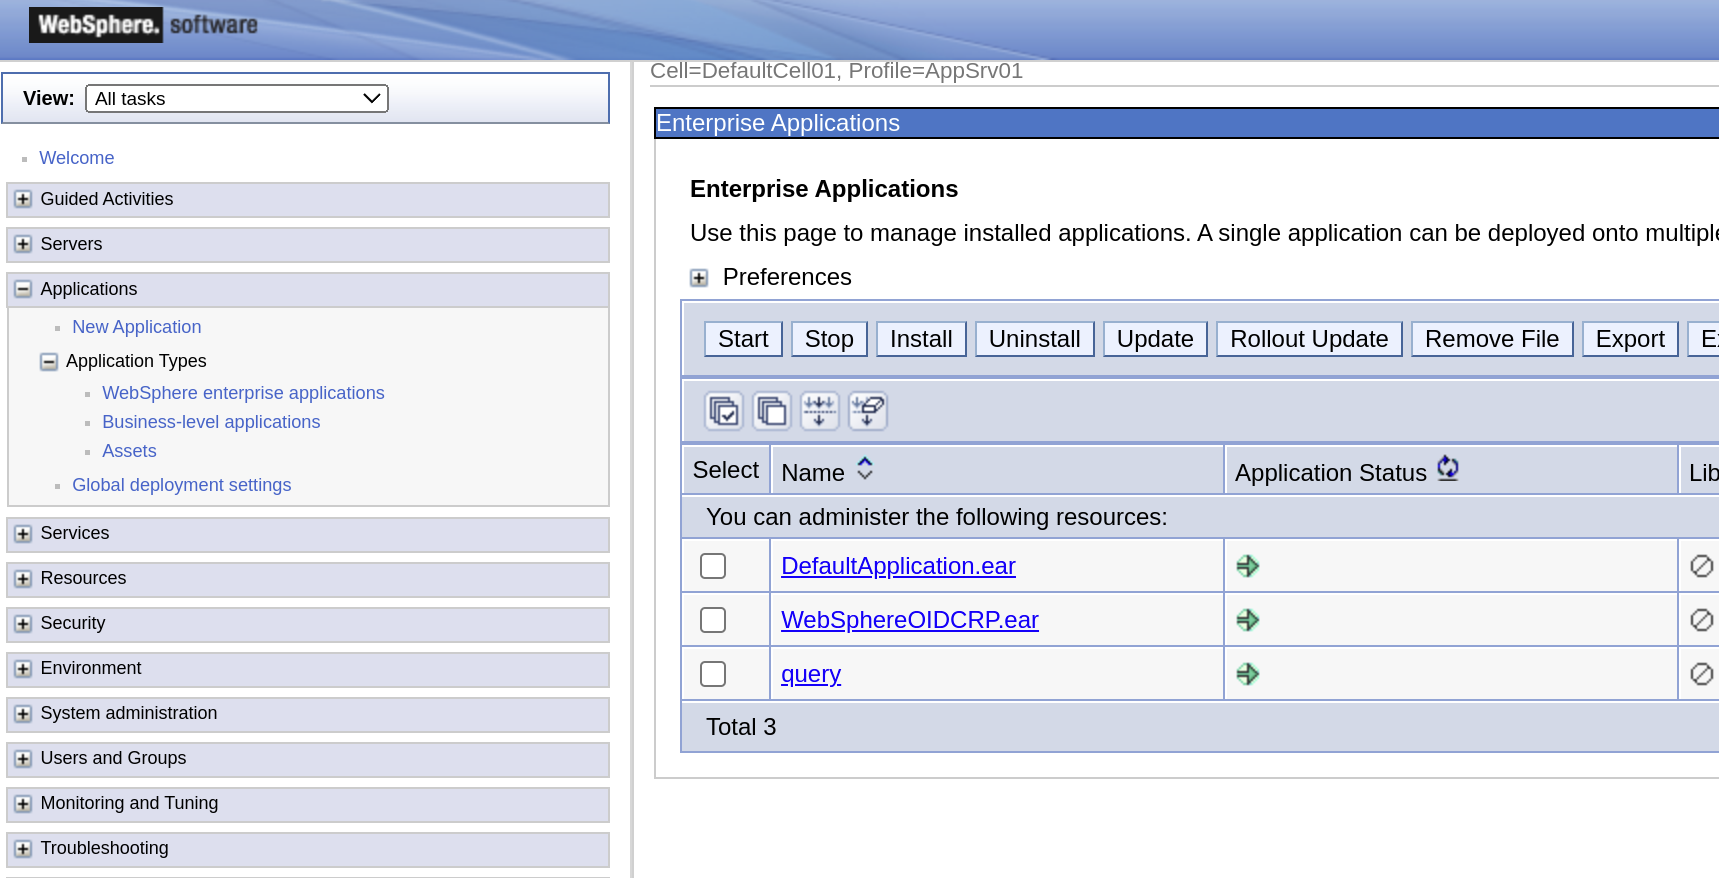
This shows that both pre-configured applications are installed and running.
You can also access the installed DefaultApplication (https://localhost:9443/snoop)
WebSeal configuration
Certificates
I’ve created 2 certificates in my reverse proxy’s pdsrv keystore, and exported their public keys.
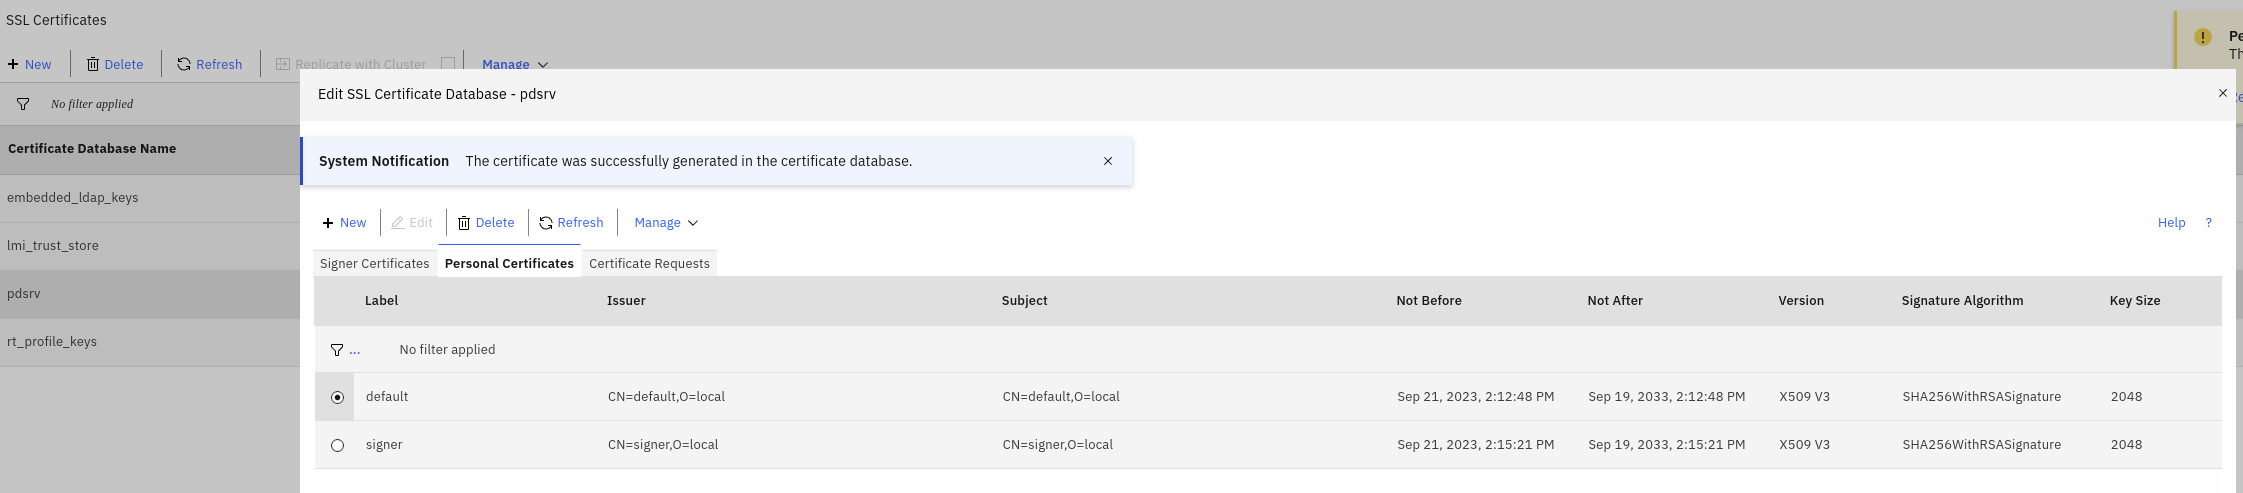
These need to be added (or at least the public keys) to the WebSphere’s NodeDefaultTrustStore. (This is already part of the ContainerFile build).
Or better put, WebSphere needs 1 of these 2 signer certificates:
- if you use the jwks.json endpoint, WebSphere needs the
defaultsigner to be able to contact to endpoint using https. - if you don’t use the jwks.json endpoint, WebSphere needs the
signerkey.
Note: It should not be necessary to include the signer key, this is the public key for the key that will be used to sign the jwt.
This key should be available through jwks.json (the local app), but for some reason, WebSphere cannot handle a JWK Set document that does not contain a use claim.
Update: There is a hotfix available on v10.0.6 (from IBM Support), to include the use claim in the jwks.json of the jwks local-app in WebSeal.
Enable the jwks local app
So one of the nice things about the jwt junction, is that it comes with a local-app, that exposes the public keys of the pdsrv or junction keystore as a Json Web Key Set. This does not work with the WebSphere OIDCRP TAI at this moment, as mentioned above.
[local-apps]
jwks=jwks.json
cred-viewer=credviewer
NOTE there’s an issue in ISVA v10.0.5 , where the kid does not match the key-label from the jwt junction. There’s a hotfix for this, or you can use v10.0.6.
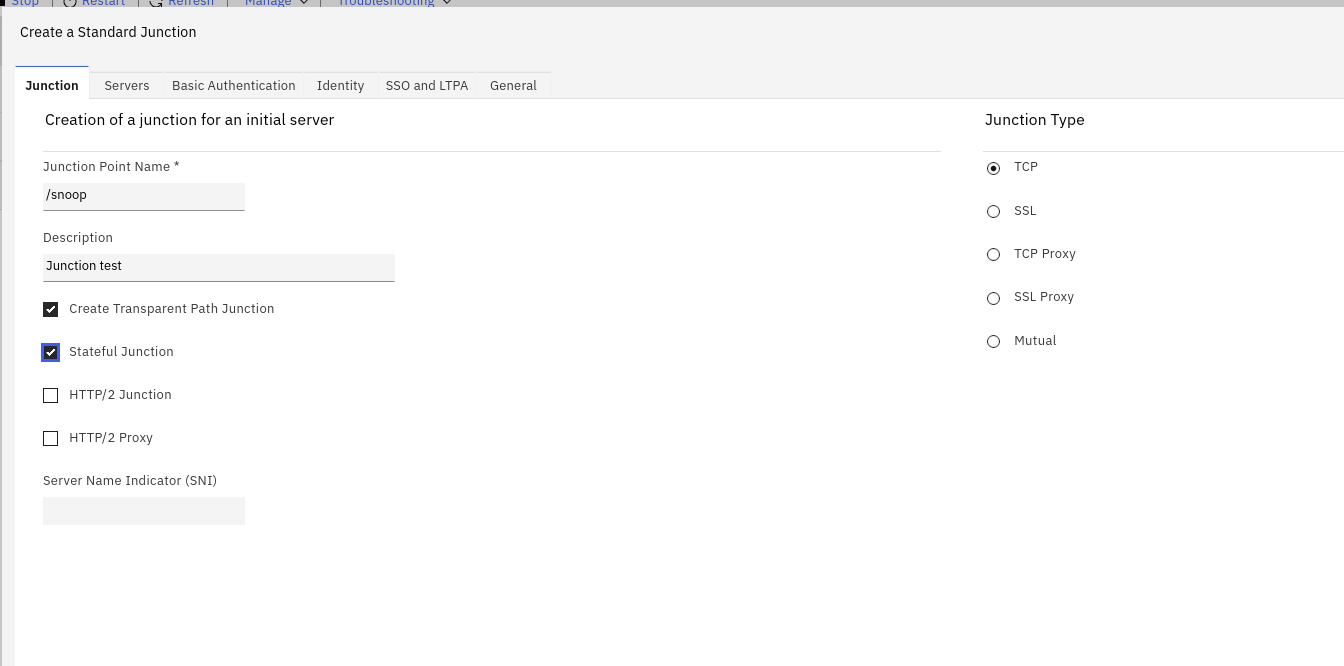
Create an SSL junction
You can now create an SSL WebSeal junction to point to the new application server.
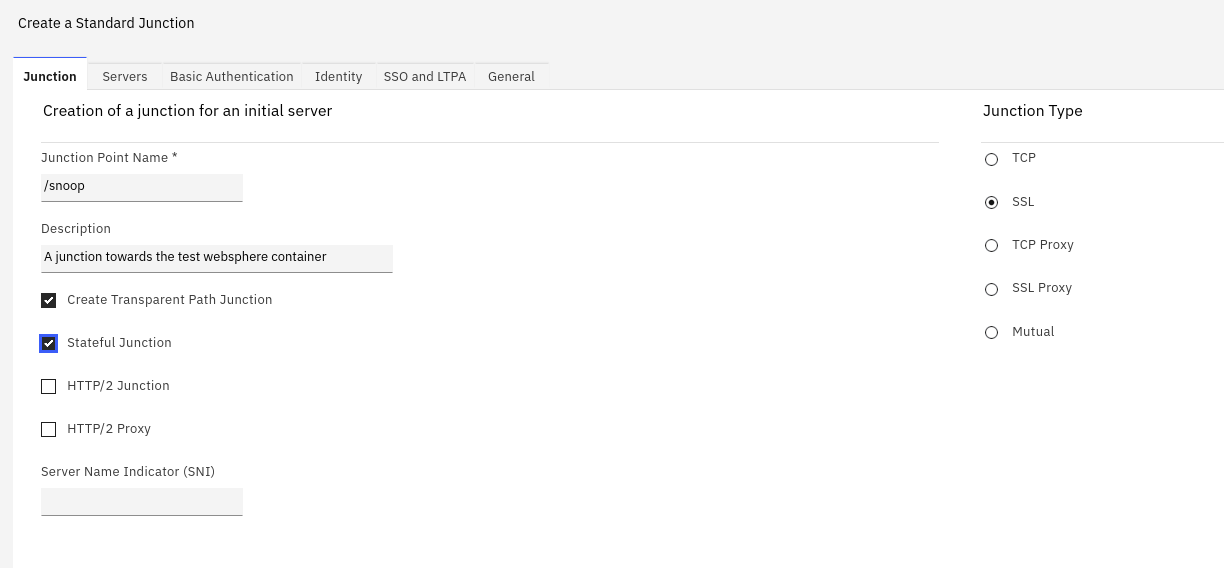
However , I’m using a TCP junction, because that’s a lot simpler (with every restart of the WebSphere container, it starts with a different certificate).
Configure a jwt junction
Specifics here are the sub claim (this is the default claim where WebSphere will get the username from), and
a fake audience aud claim (I’m not using it, but without it, WebSphere complains).
This configuration will send the jwt in the Authorization header, as a Bearer token.
[jwt:/snoop]
key-label = signer
claim = attr::AZN_CRED_PRINCIPAL_NAME::sub
claim = text::https://issuer::iss
claim = text::fake_audience::aud
claim = attr::tagvalue_session_index::traceid
include-empty-claims = false
hdr-name = Authorization
hdr-format = Bearer %TOKEN%
lifetime = 800
renewal-window = 15
jwt result
The resulting jwt looks like this (through https://jwt.io).
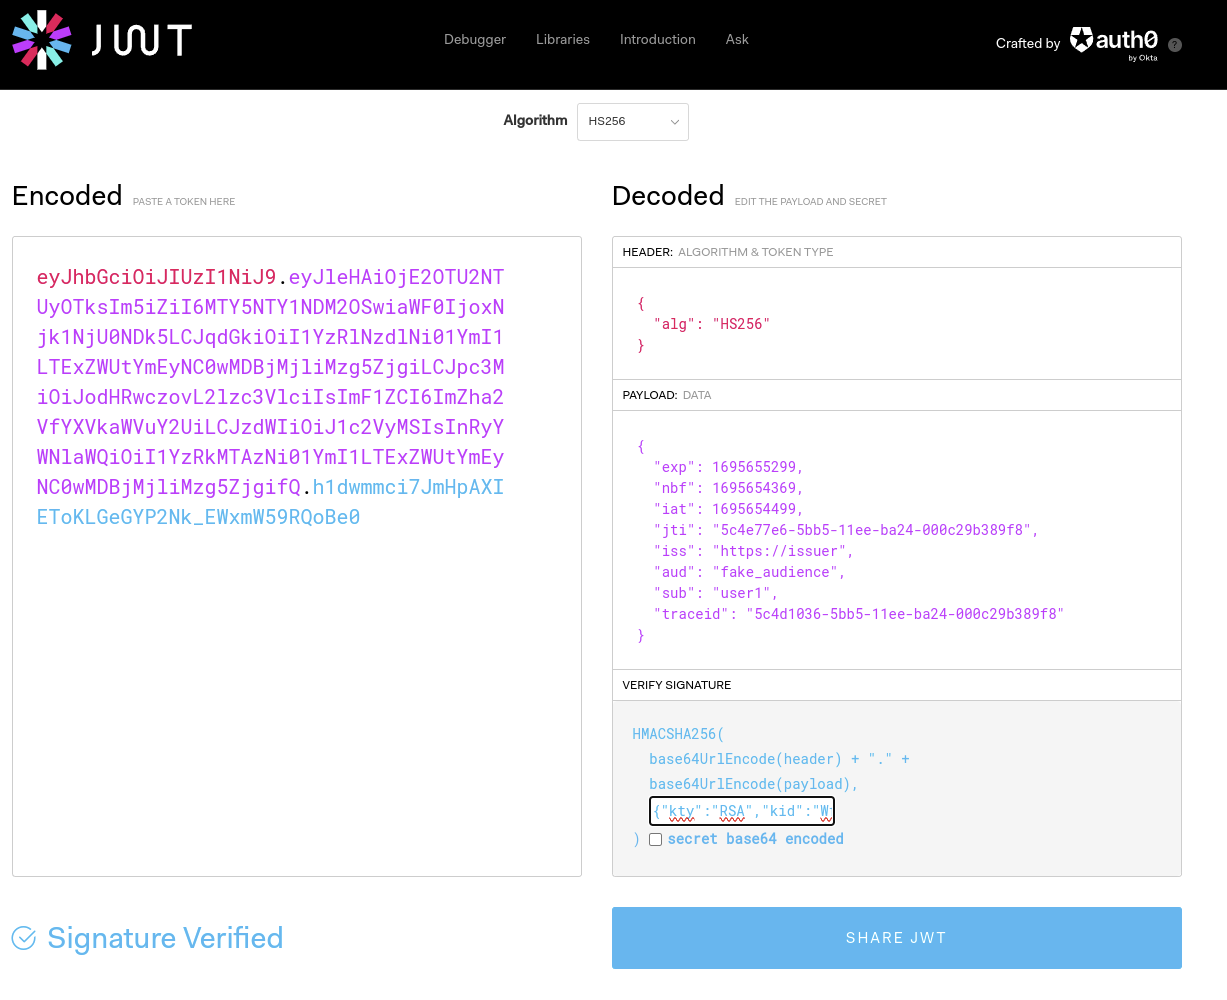
You can use the key from your jwks local-apps , to also verify the signature.
And as always, don’t throw private or sensitive (production) data in a public website (base64 decode the part between the first and second dot . )
{
  "exp": 1695655299,
  "nbf": 1695654369,
  "iat": 1695654499,
  "jti": "5c4e77e6-5bb5-11ee-ba24-000c29b389f8",
  "iss": "https://issuer",
  "aud": "fake_audience",
  "sub": "user1",
  "traceid": "5c4d1036-5bb5-11ee-ba24-000c29b389f8"
}
If you have the DefaultApplication working in the end, you can simply pickup the jwt from the output of /snoop (the incoming headers are shown)
Setup ACLs
The jwks.json endpoint (if you can use it) should be publicly available . So you need to assign an anonymous ACL to it.
Create a user in the local registry
So be able to login to WebSeal, you can use any method of course. But in this case, I’ve created a local user in the local registry using the Policy Administration.
Login to /snoop through WebSeal
So everything is ready on both WebSeal and WebSphere.
Start by accessing the snoop url through the webseal hostname : https://`webseal-hostname`/snoop This shows the login page of WebSeal (only authenticated users can access the /snoop junction).
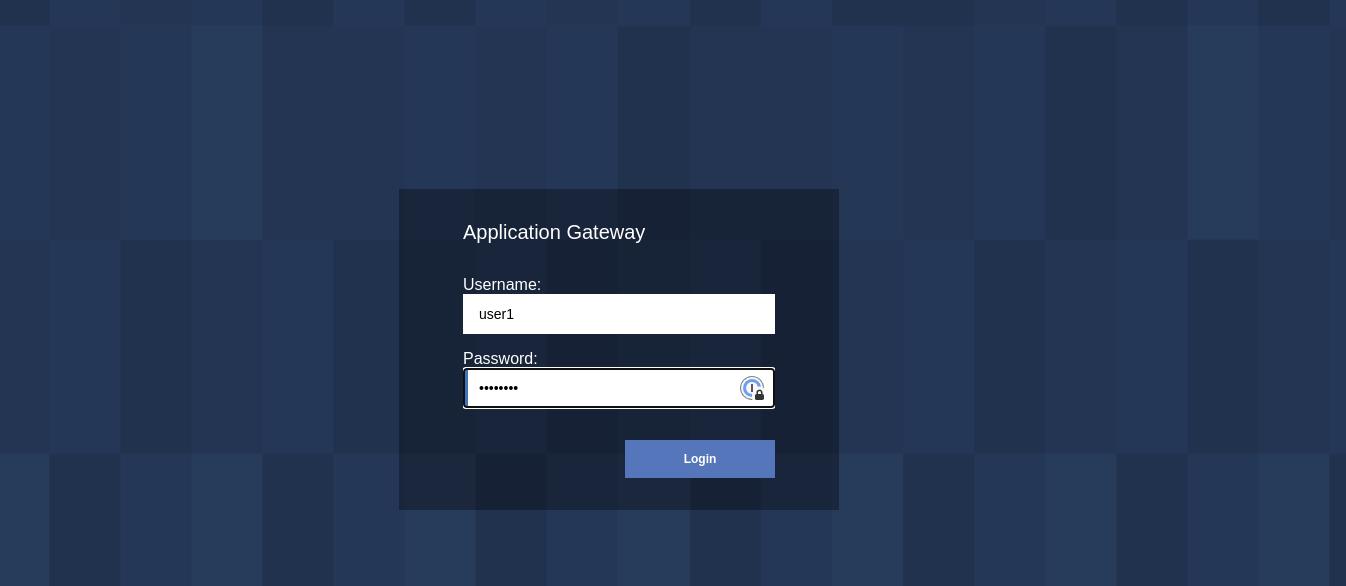
The snoop servlet is configured for Application security, so it’s not accessible for unauthenticated users.
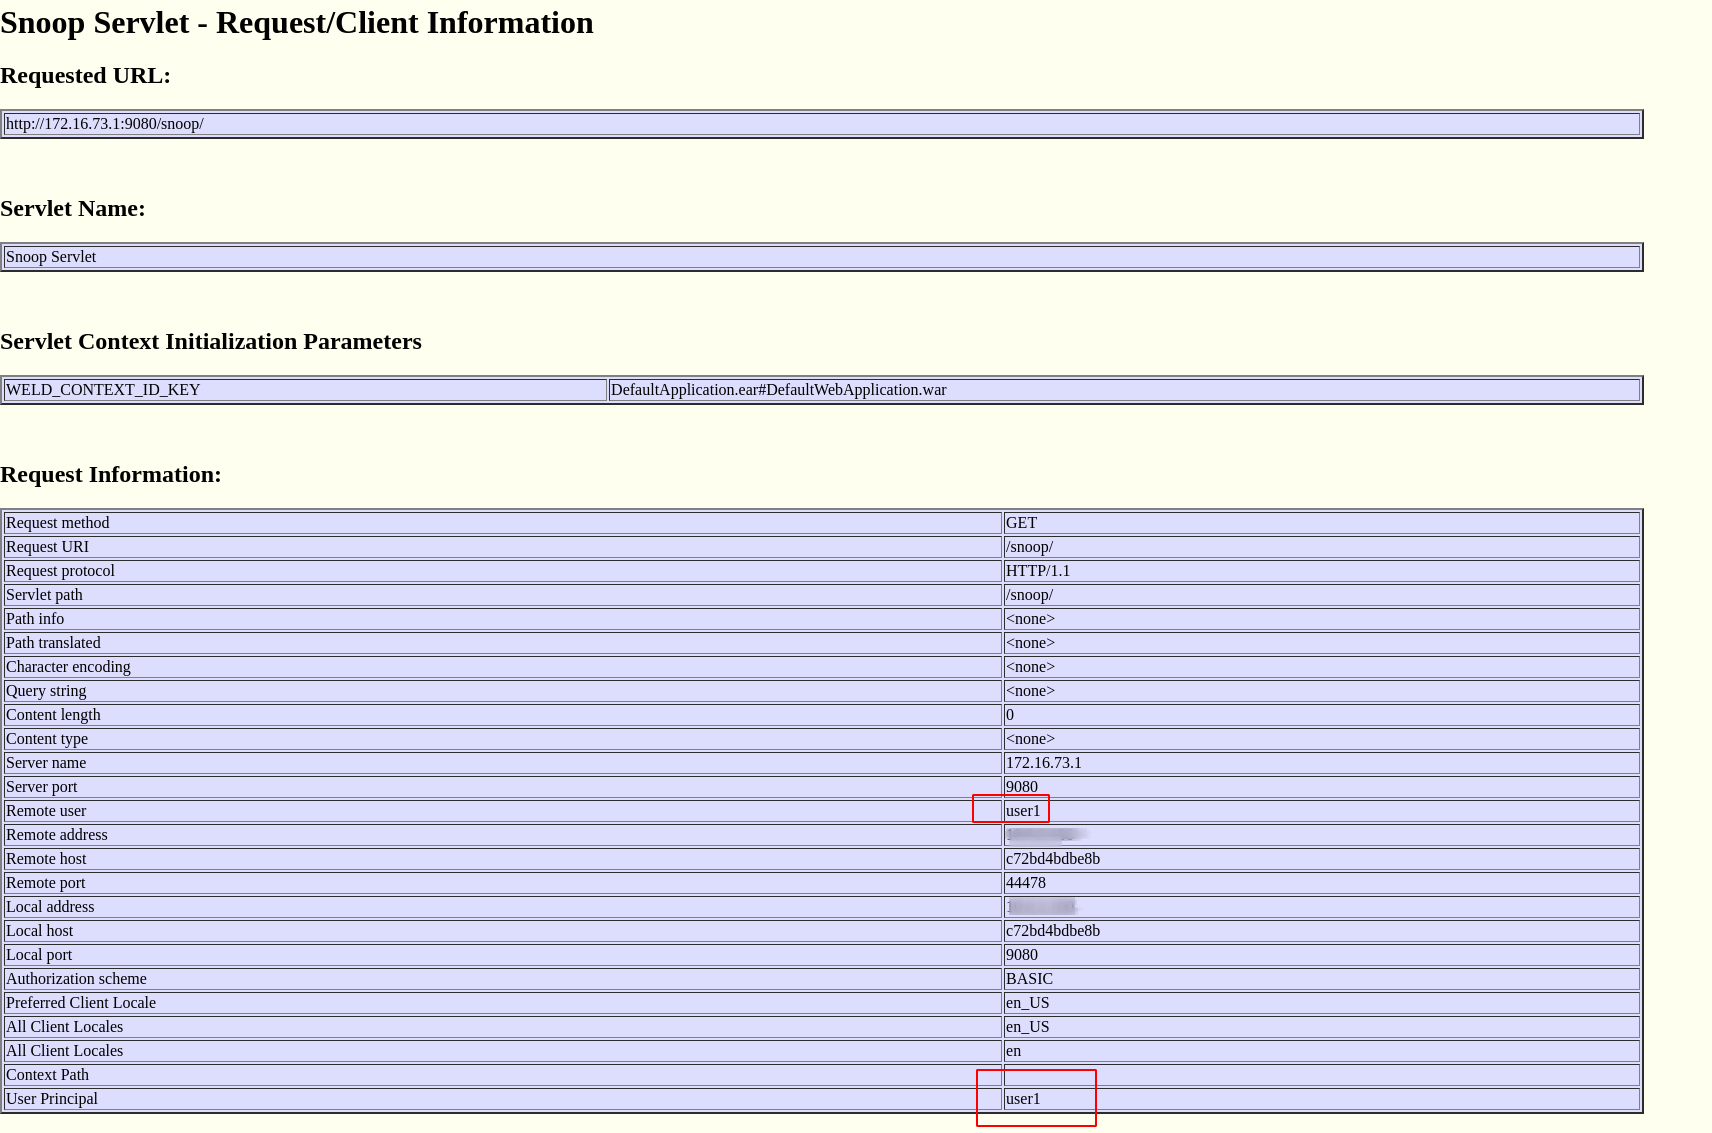
The jwt is visible (not in the screenshot) a bit lower on the page, but the important info here is the “User Principal”, which comes from the jwt. This indicates the user is authenticated (and authorized) correctly in WebSphere and in the /snoop application.
Next steps
To read the other claims from the incoming jwt (in this example, for instance the claim traceid), more code is required.
You can do this in the application, or my implementing a LoginModule on WebSphere.
Troubleshooting
You can enable trace settings on WebSphere, to see a bit more information in the log files.
*=info: com.ibm.ws.security.*=all
Since the WebSphere container uses HPEL logging, there’s no file to tail, instead you can use the logViewer. You can tail the logs like this:
podman exec -it was /opt/IBM/WebSphere/AppServer/profiles/AppSrv01/bin/logViewer.sh -monitor
Alternatively, go into the container and start the logViewer there.
cd /opt/IBM/WebSphere/AppServer/profiles/AppSrv01/bin
./logViewer.sh -monitor