Ansible Execution Environment for the IBM ISVA Ansible collection revisited
This is a follow-up to an earlier blog entry I wrote.
Ansible-builder is greatly simplified, and included in ansible-navigator (I say included, but it’s installed together with ansible-navigator).
Ansible Builder
Install ansible-builder v3.0 or higher
Install Ansible Builder, the tool to build a new execution environment. This example installs ansible-navigator (with ansible-builder) in a separate Python virtual environment (using a separate virtual environment is optional).
Note that you must have Python 3.8 or up, otherwise ansible-builder does not work.
python3.9 -m pip install virtualenv
python3.9 -m virtualenv ~/venvansiblebuilder
source ~/venvansiblebuilder/bin/activate
pip install ansible-navigator --upgrade
You MUST have version v3.0 or higher for ansible-navigator and ansible-builder.
Configure the image
Create a directory to contain your build information.
mkdir ~/builder
cd ~/builder
This directory needs to contain the configuration files for builder. Most of these files are optional, but in the use case of preparing an image for ISVA, only ansible.cfg is optional.
-
bindep.txt : contains the operating system packages. The base image for ansible-runner is built on Cent OS
-
requirements.txt : contains the Python libraries
-
requirements.yml : contains the Ansible Galaxy configuration
-
ansible.cfg : an ansible configuration file (optional)
execution-environment.yml
This is the main configuration file. It contains the references to the configuration files for Python, the system and Galaxy, and allows you to include additional (Docker build) commands.
There’s a newer version format here in comparison to the previous blog post (and I use different base images)
---
version: 3

images:
  base_image:
    name: quay.io/centos/centos:stream9

dependencies:
  ansible_core:
    package_pip: ansible-core>=2.15
  ansible_runner:
    package_pip: ansible-runner
  python:
    - requests
    - jmespath>=1.0.1
    - PyYAML>=6.0
    - python_ldap
    - ibmsecurity==2023.7.6.0
    - cryptography==37.0.2
    - python-dateutil
    - setuptools>=68.0.0
  python_interpreter:
     package_system: "python3.9" # default python in CentOS9 stream
  galaxy: requirements.yml
  system:
    - gcc [platform:rpm]
    - glibc-devel [platform:rpm]
    - make [platform:rpm]
    - git [platform:rpm]
    - python3-devel [platform:centos]
    - python3.9-devel [platform:rpm]
    - openldap-devel
    # support for libselinux
    - python3-libselinux [platform:rpm]

additional_build_files:
    - src: files/ansible.cfg
      dest: configs

additional_build_steps:
  prepend_galaxy:
    - ADD _build/configs/ansible.cfg /etc/ansible/ansible.cfg
  prepend_builder:
    - USER root
    - RUN dnf update -y
    - RUN /usr/bin/python3 -m pip install --upgrade pip
  append_final:
    RUN echo Successfully built the IBM ISAM Ansible Execution Environment with ibmsecurity 2023.7.6.0
The images.base_image (previously EE_BASE_IMAGE for version 1) is the base image to start from.
There is no separate builder image anymore.
You can start from any base image, if you have a Red Hat subscription, you can use one of the standard Execution environments that come with Ansible Automation Platform,
eg. registry.redhat.io/ansible-automation-platform-23/ee-minimal-rhel8:latest
requirements.txt (Python)
The required Python libraries. You can define versions here if you need to (it’s a Python requirements file, after all)
The execution-environment.yml as shown here, includes the requirements directly, but it’s still possible to use a requirements.txt file.
NOTE If you have a running Python virtual environment for the IBM ISAM Collection, you can start with
pip freeze > requirements.txt. —
Custom Python libraries cannot be added here, because pip requirements do not support “Private repos” in addition to pypi.org.
So if you want to add a custom Python repository (like test.pypi.org), we can add this in the prepend_final section of
additional_build_steps.
RUN pip install --upgrade --index-url https://test.pypi.org/simple/ --no-deps tbosmans-isam-demo
NOTE It is actually possible to define an index-url in the requirements.txt file, but this means that ALL python requirements are then taken from that index-url , eg. test.pypi.org).
You can introduce your own /etc/pip.conf file, by using a prepend_base build step.
For instance (if you have etc/pip.conf in the _build directory): ADD _build/etc /etc
—
requirements.yml (Galaxy)
The required collections and roles, that will be downloaded from Ansible Galaxy (or from whatever you define in ansible.cfg). The configuration with a reference to the custom collection , looks like this:
---
collections:
  - community.general
  - ibm.isam
  - name: https://github.com/tombosmansibm/custom_isam_collection.git
    type: git
bindep.txt (linux)
The required linux system packages. What’s in here will be passed to
dnf (the default package manager on Cent OS). Note that the EE’s from AAP use microdnf. You need to add an options.package_manager_path: /usr/bin/microdnf variable.
# necessary for ibmsecurity:
python38-devel
openldap-devel
gcc
# support for git based repositories
git
ansible.cfg
The use of ansible.cfg is entirely optional, but you may need it if you have your own automation hub. Note that this is not necessary if you just don’t preinstall the collections…
[galaxy]
#server_list = automation_hub, my_org_hub, release_galaxy
server_list = release_galaxy

[galaxy_server.automation_hub]
url=https://cloud.redhat.com/api/automation-hub/
auth_url=https://sso.redhat.com/auth/realms/redhat-external/protocol/openid-connect/token
token=my_ah_token

[galaxy_server.my_org_hub]
url=https://automation.my_org/
username=my_user
password=my_pass

[galaxy_server.release_galaxy]
url=https://galaxy.ansible.com/
Build the image
Once you have prepared the configuration files, you can build the image.
You can immediately tag it (-t) and give it verbose output (-v 3 , 2 is the default but is not very informative).
ansible-builder build -v 3 -t ibm-isva-ee:1.0.0
Problems during build
If you run into problems during build, it’s a good idea to pull in the latest base images from Quay.io.
In this case:
podman pull quay.io/centos/centos:stream9
And then try again.
Push the image to a container registry. (optional step)
This step makes more sense if you use a local registry for your container images.
Login to the registry
podman login quay.io
Tag the image (optional if you already tagged it during the build step)
podman tag localhost/ibm-isva-ee:0.0.5 ibm-isva-ee:latest
Push to the registry. You need to replace my name with your own.
podman push localhost/ibm-isva-ee:latest quay.io/tombosmansibm/ibm-isva-ee:latest
For quay.io, you’ll now have to make the image public using the web interface unless you have at least a ‘Developer’ plan with them.
Ansible Navigator
Now you can run playbooks using Ansible Navigator with the image you just created yourself, or with the image I created earlier.
Prepare file structure
There’s a structure that Ansible Navigator expects : you need a directory
containing your playbooks, with a directory named inventory to contain
your inventories.
directory structure
<playbook_dir>
├── ansible.cfg
├── ansible-navigator.yml
├── vault_password.sh
├── collections
│   └── requirements.yml
└── playbook.yml
ansible-navigator.yml
This file is a yaml file that can contain some of the commandline arguments as defaults.
This is an example, based on the image that I pushed to Quay.io earlier.
---
ansible-navigator:
  ansible:
    config:
      help: false
      path: ./ansible.cfg
    inventory:
      entries:
        - "~/ansible/isam_ansible_inventories/local"
  color:
    enable: true
    osc4: false
  app: run
  execution-environment:
    container-engine: podman
    enabled: true
    environment-variables:
      pass: []
    image: quay.io/tombosmansibm/ibm-isva-ee:latest
    pull:
      policy: tag
  mode: stdout
  time-zone: Europe/Brussels
ansible.cfg
The ansible.cfg contains the collections_path parameter, to make sure the collections are loaded from the
collections directory here.
[defaults]
gathering = explicit

no_target_syslog = True
################
# Reset role vars.  TODO: This should resolve a number of issues with the IBM ISAM Collection (TBC)
private_role_vars = true
#
############
collections_path = ./collections:~/.ansible/collections:/usr/share/ansible/collections

[inventory]
# If 'True' unparsed inventory sources become fatal errors, otherwise they are warnings.
unparsed_is_failed = True

[persistent_connection]
command_timeout = 180
Install Collections locally
So we have installed a collection into the Execution environment, which means that these next steps are not strictly necessary. However, this is the recommended approach, because you can update your collections without having to build a new Execution Environment !
In ansible-navigator, the playbook directory is made available in the execution environment.
So by installing the collections into the ./collections directory adjacent to the playbook directory,
it will be available in the container.
ansible-galaxy collection install -r collections/requirements.yml -p ./collections --force
Vault Passwords with ansible-navigator
Passing vault passwords to the Execution environment is a bit tricky. Ansible Automation Platform does this automatically , so you don’t have to worry about it there. But in ansible-navigator, you need to make the password available to the EE container.
I use a slight variation from what’s in the documentation https://ansible-navigator.readthedocs.io/faq/#how-can-i-use-a-vault-password-with-ansible-navigator
Create a file vault_password.sh .
Make it executable
vault_password.sh
#!/bin/sh
echo ${ANSIBLE_VAULT_PASSWORD}
Now when starting ansible-navigator, all environment variables that start with ANSIBLE_ are passed to the EE.
So before starting ansible-navigator, you need to store the vault password in the variable
ANSIBLE_VAULT_PASSWORD.
Make sure to prepend the export command with a space ( ), to keep it out of the command history !
This does not make the password completely secure or invisible though. It is still stored in the /proc filesystem (ao. under /proc/self/environ for the logged in user).
export ANSIBLE_VAULT_SECRET=my_password
Then you can start ansible-navigator and use --vault-id to link your vault with the bash script.
ansible-navigator run playbook.yml -i myinventory --vault-id "VAULTID@vault_password.sh"
NOTE There’s an option in ansible-navigator now, to enable prompts (similar behaviour to ansible-playbook). I have not used it myself. —
Vaults in Ansible Automation Platform
Ansible Automation Platform, like Tower before it, does not support encrypted vault files in the inventory. So then you have 2 options:
- use encrypted variables
- put the vault files elsewhere
You can easily put the vaults in group_vars and/or host_vars directories adjacent to your playbook directory, like this: I recommend to ONLY keep vaults in this directory structure, to avoid complicated variable precedence rules in Ansible.
├── ansible.cfg
├── ansible-navigator.yml
├── group_vars
│   └── all
│       └── vault.yml
├── host_vars
│   └── 172.16.73.131
│       └── vault.yml
├── collections
│   └── requirements.yml
└── playbook.yml
Run playbooks with ansible-navigator
To run the ‘playbook.yml’ in the current directory on the execution environment, you’d do this:
ansible-navigator run playbook.yml
The inventory parameter (-i) is optional, because we included an inventory in our ansible-navigator.yml file.
Run playbooks from the collection
You can also run playbooks directly from the ibm.isam collection, using a fqcn notation:
ansible-navigator run ibm.isam.connectivity_check.yml -l 172.16.73.131
Note that this is not (yet) possible in Ansible Automation Platform !
Debug your custom Execution environment
You can start a bash session in the Execution environment using the exec command :
ansible-navigator exec
Run playbooks in Ansible Automation Platform
As mentioned earlier, it’s not possible to run playbooks directly from a collection in Ansible Automation Platform (because the UI demands a playbook in the configuration of a Task).
That playbook can import the playbook using import_playbook, with the fqcn (fully qualified collection name).
---
- name: import playbook from collection
  import_playbook: ibm.isam.connectivity_check.yml
Ansible Automation Platform preparation
To run the playbooks on Ansible Automation Platform, we need to define a number of components:
Credentials
There’s various credentials required to run this
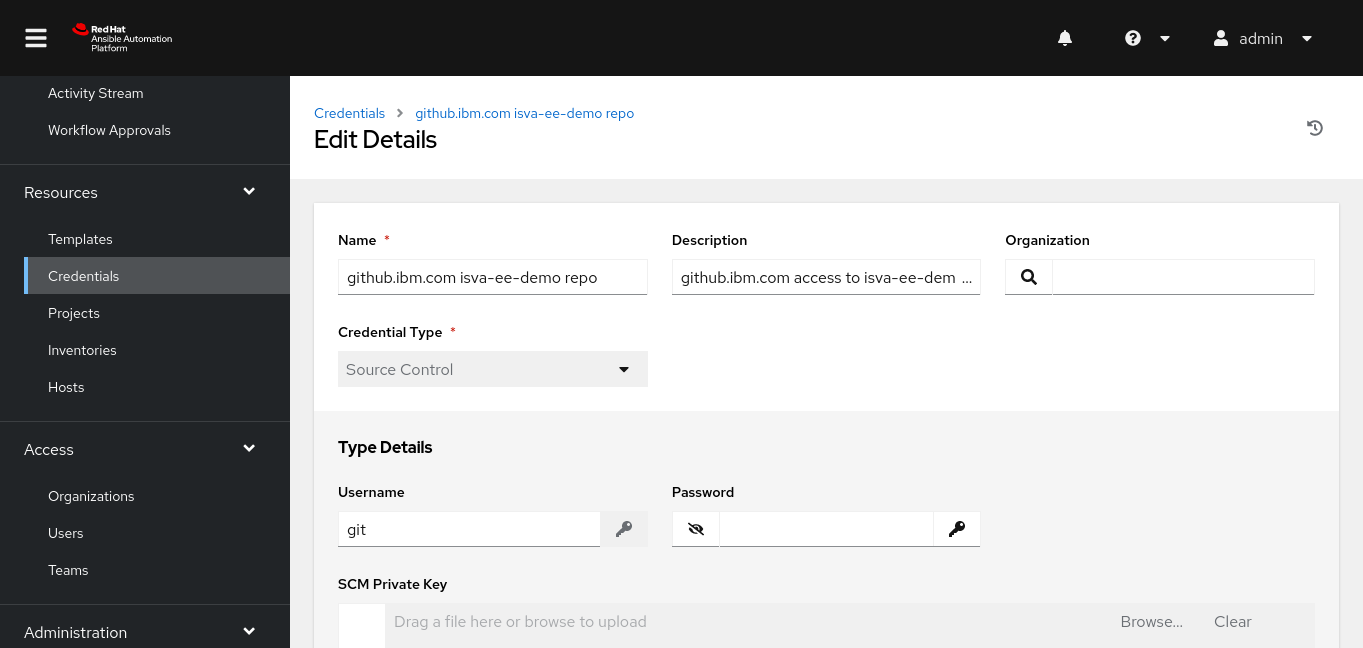
- SCM credential : the credential to use to pull the information from GitHub.
- Vault credential : the password for the vaults
SCM Credential
In this case, I’ve generated a new SSH key, and placed the private key in this SCM credential. The public key is added in Github as a deploy key in this case.
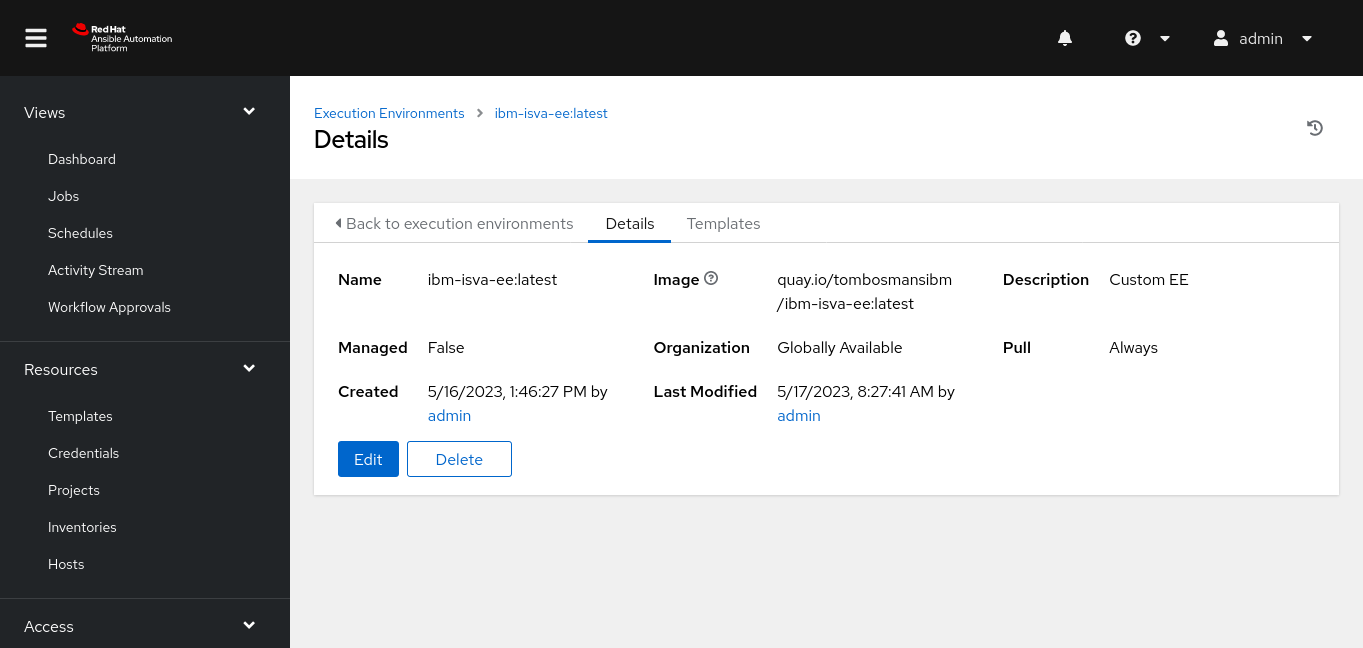
Execution environment
The EE can be downloaded from Quay.io. Note that there’s no need for a credential here, since the resource is marked public in Quay.io.
This is the same Execution Environment we use to run ansible-navigator and it’s the EE I published earlier.
Project
The Project links to the Git repo that contians your playbooks.
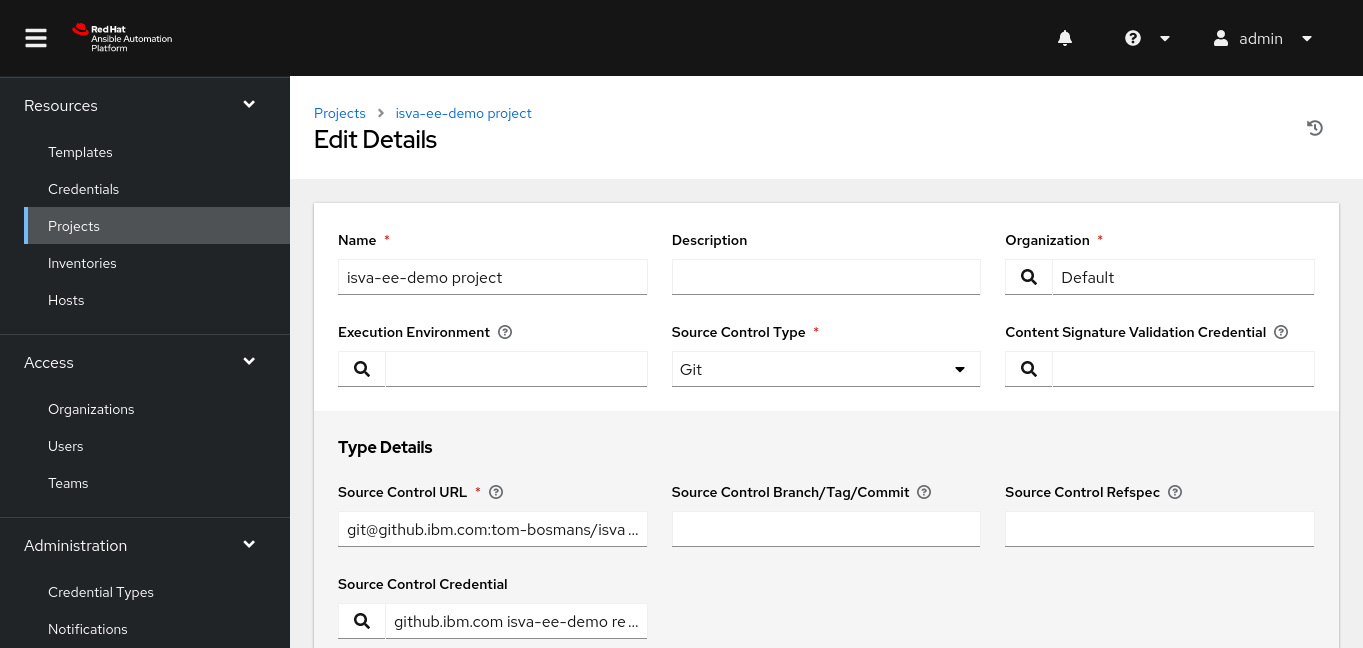
In this case, we have the inventory as part of the Project.
Inventory
Create a new inventory.
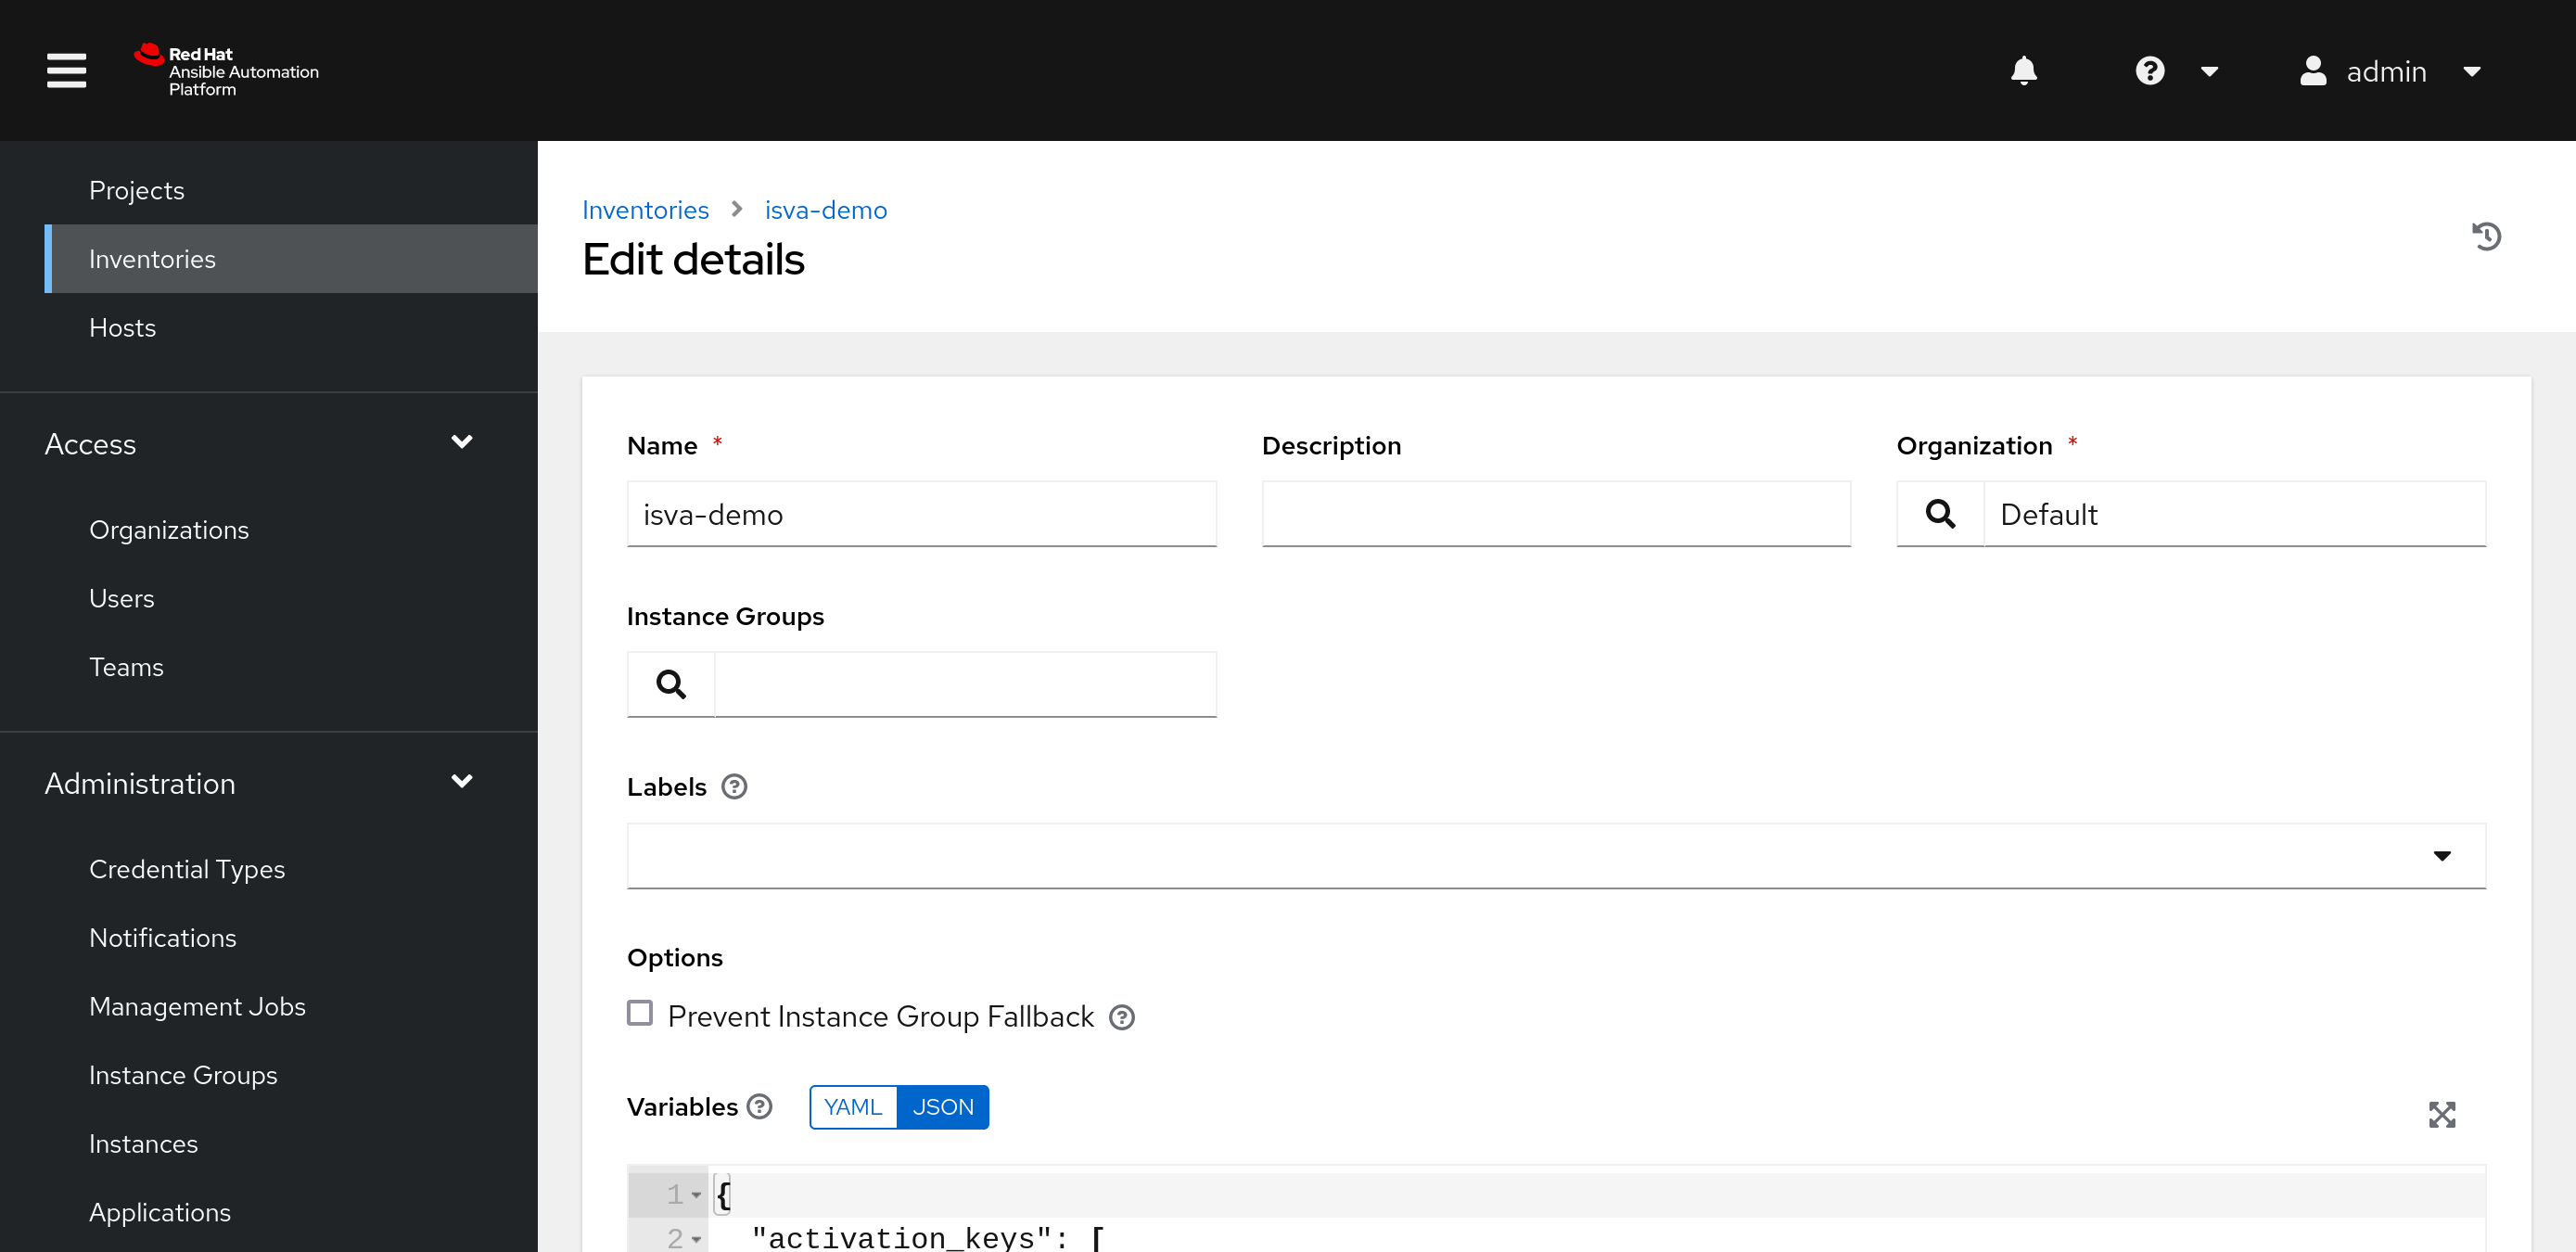
After initially saving the inventory, the Sources tab becomes available.

Now we can add a Source, where we can select “Sourced from a Project”. Select the Project we created earlier (because that includes the inventory as well).
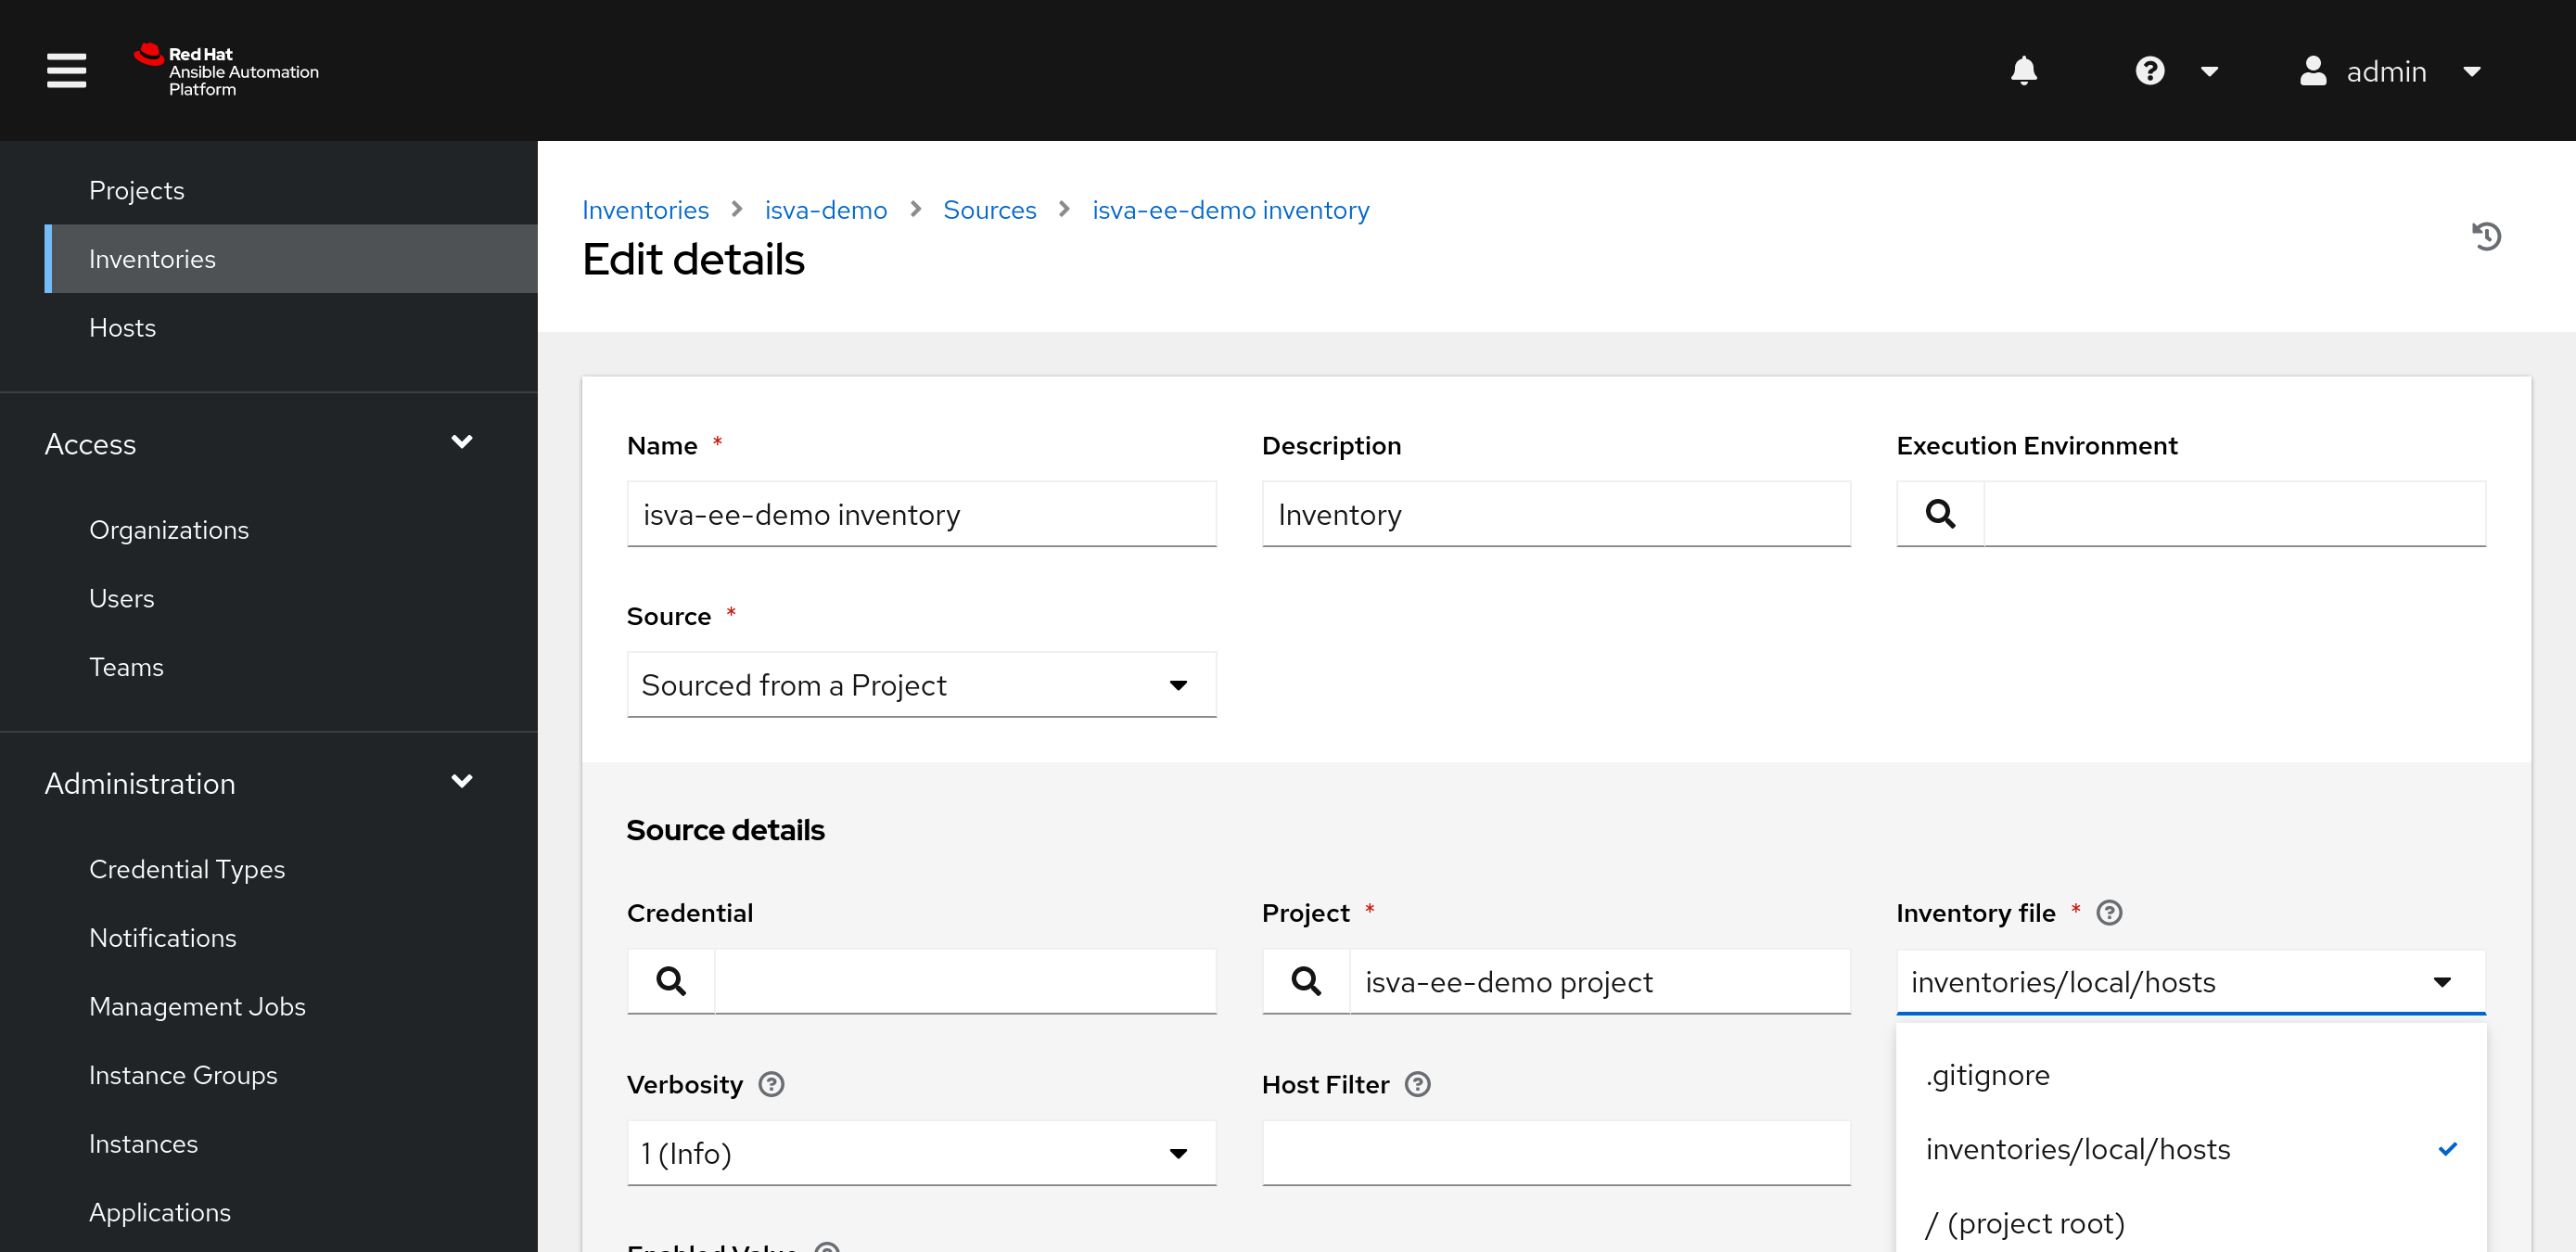
Obviously you could split this into 2 separate projects : a Project with the Playbooks and a Project that contains your inventories.
Task
Finally, in the task, you link the Project, Inventory and the actual playbook you want to execute.
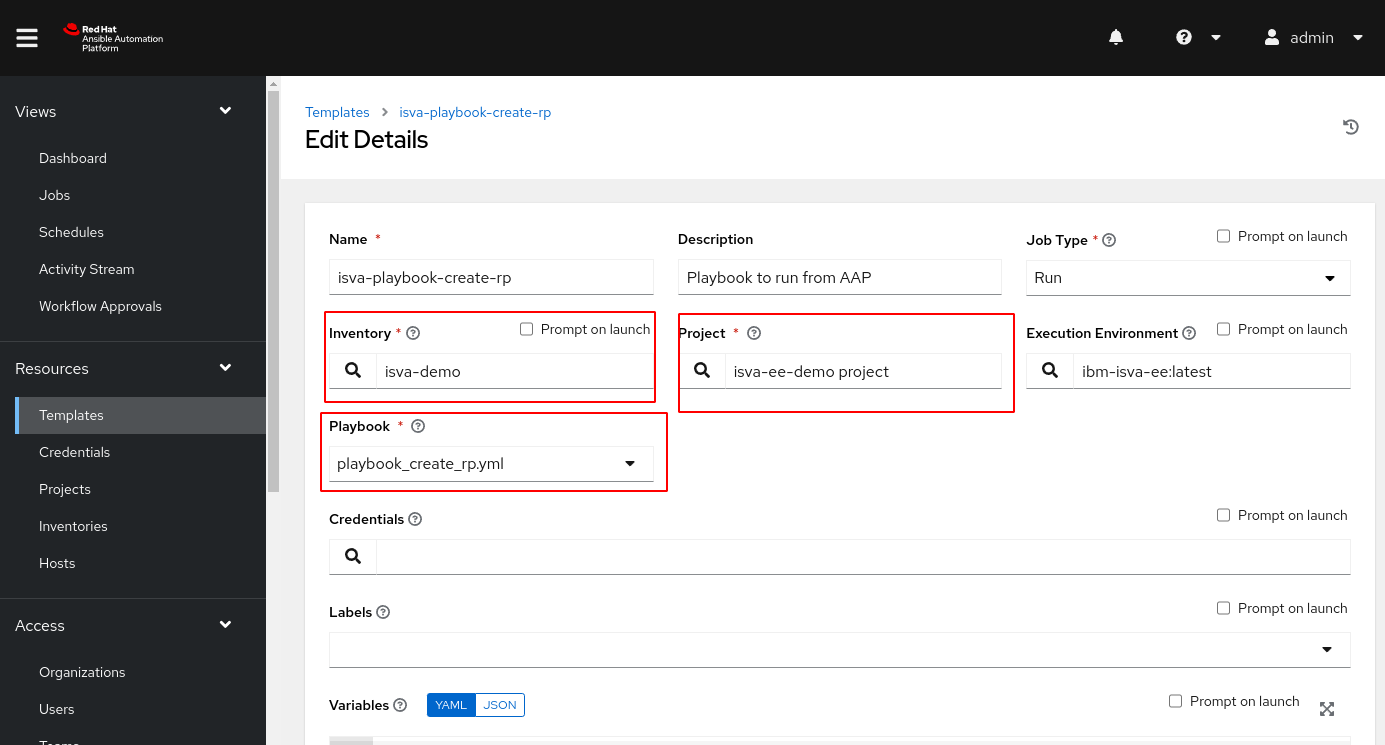
Note that you would definitely need a credential here.
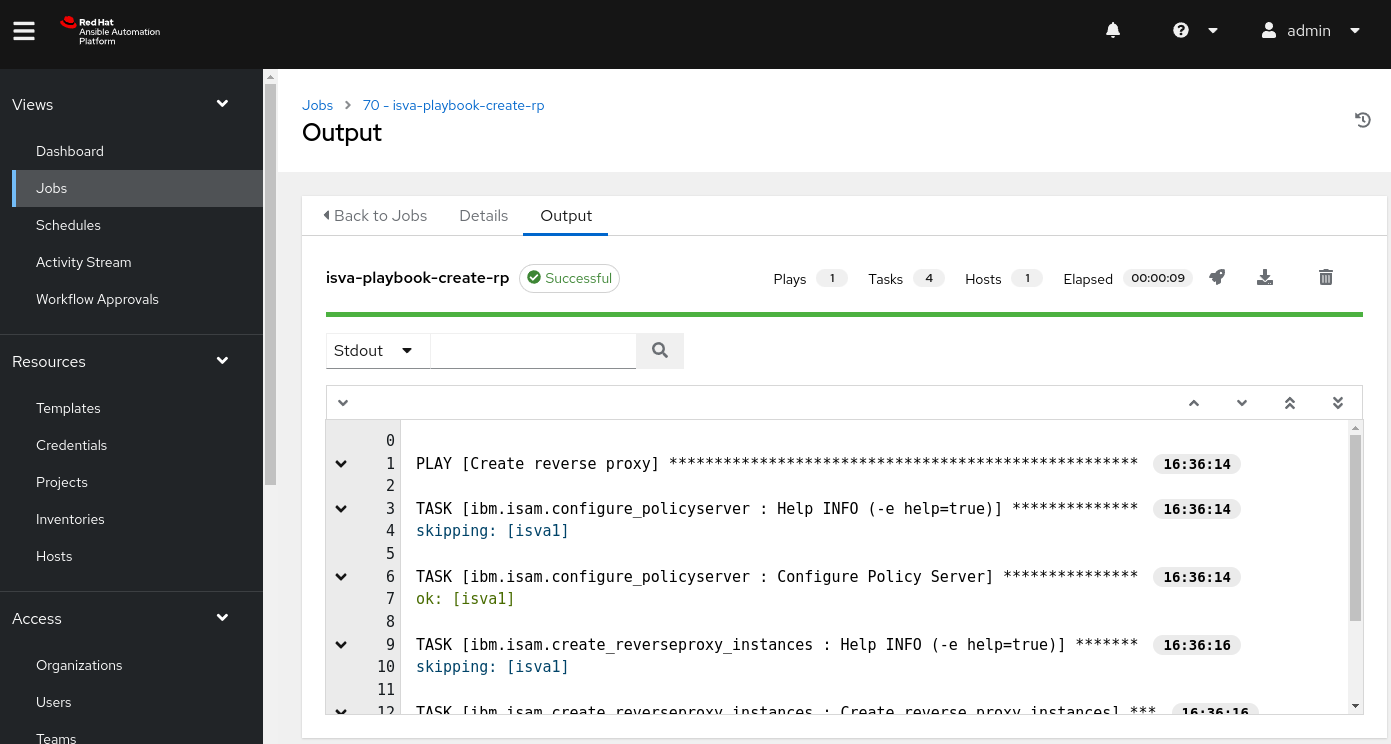
Run the task
So now you can run the task. This creates a job. If everything works correctly, you’ll see the successful completion and the ansible log !